Last year (just scroll down, not like I've posted much lately) I mentioned a Powermatic 1200 drill press I was in the process of restoring. Last Friday I finished it. Here are some pics of the completed machine. Right now I feel the urge to write something patriotic, or reminisce about the heyday of manufacturing in America, but I don't have the skill to. I'll let this machine speak for me.
Showing posts with label Workshop. Show all posts
Monday, February 14, 2011
Friday, November 12, 2010
The Allure Of Old Iron

When I started this blog I wasn't quite sure where it would lead. I first thought I'd use it to announce new products and services for my oud-related ventures. A lazy way to update the website, if you will. It quickly morphed into a sort of "research" medium for exploring everything from music and vintage photography to planemaking and French workbench construction.
Since I began another blog over at Benchcrafted, this blog had suffered a bit. And I apologize. I'm doing some interesting things that I'd like to share, but the past few months have been a bit slow regarding new personal work. And frankly, some of what I'm doing is quite boring. A 10' Shaker dining table in cherry, another iteration of this carved piece, some more benches. I'm actually not a fan of blogs unless they have something useful to offer. So that may explain the gap in posting. Nobody wants to read about what I had for breakfast.
So onto the topic at hand. Old Woodworking Machines. They've always held a great appeal. Especially when machine manufacturers put some style into the castings. Back before the bottom line ruled the design process.
I recently picked up a Powermatic 1200, 20" drill press. This is one machine I've been searching for for quite some time. I'd needed a new drill press, a real drill press if you will, and after some research on new options, I decided to throw my hands up and just buy a Chinese Jet from the local Menards. I was never happy with it, and I figured it would fill the bill until something more substantial showed up.
The PM 1200 showed up on Craigslist, and I was the first one to call. I offered the man (who had bought the machine at auction, without realizing how huge it was) half of what he was asking, and after I came up a bit we shook hands and hoisted the press into the back of my pickup, all 500 pounds of it. I drove home with a glint in my eye and a feeling of great satisfaction. This machine is about 40 years old. Just a bit older than me.
It was all downhill from there.
I've never had so much fun getting greasy and dirty on a Sunday afternoon.
Right now I'm about midway through the restore. It's highly satisfying work. So far it's mostly been about stripping and painting. The press was brushed with at least three post-factory colors, and the meathead who applied it didn't seem to think that moving parts ever needed adjustment, just paint over everything. It was a mess. But slowly it's coming together.
There is a bittersweet aspect to this restore though. Powermatic is not the American company they once were. Indeed, almost none of the old guard machinery manufacturers produce machines on American soil. I don't know what the future holds for American manufacturing, but I do know that my efforts to bring this American machine back to hopefully better-than-new condition will be greatly rewarded by the thought of future generations enjoying a piece of American manufacturing history. As is often said, we are not owners of these tools, just custodians for a time. I hope the next owner gets as much enjoyment out of this machine as I do.
Tuesday, January 12, 2010
Traditional Woodowork in the Balkans

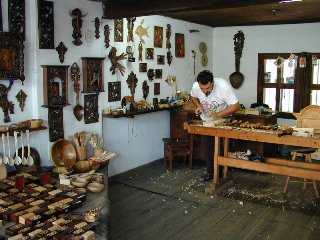
In Northern Greece there is a large peninsula that has served as the home to spiritual aspirants for over a millennium. Life on Mt. Athos (named for the peak at the eastern end of the peninsula) has remained largely unchanged since its founding in the 10th century. Greek Orthodox monks live a life of prayer and fasting, and when not engaged in prayer or worship, occupy themselves with everything from incense-making and sewing, to carving and turning wood. These items are sold in order to buy the necessities of life that can't be produced by the monks themselves. Since many of us woodworkers tend to spend large amounts of time in solitude in our shops, I'm reminded of the disciplined life of these monks whenever I'm alone in the shop. Their accomplishments go largely unnoticed though (and rightly so), as their works are left unsigned and thus anonymous. When works are signed, they are prefaced with the phrase "by the hand of..." thus showing that the work is accomplished by the grace of God, through the hand of the worker.
The following video which shows one such shop on Athos. Much like many of the pre-electric European and American shops, this is one is powered by a water wheel and leather belting. Later in the video we see a monk who specialized in miniature carving. Some of these ornate crosses take years to finish. We also see a human-powered olive oil mill.

Although not a monastic setting, the ethnographic museum "Etar" in Gabrovo, Bulgaria shares some similarities with the small shops of Athos. I visited this working museum in 2000. It's much like Colonial Williamsburg. The entire village runs off water power, harnessing that resource to drive lathes, mills and various other machines, as well as provide places for washing clothes. The shops along the main street of the village offer everything from carved spoons and boxes to fine metalware, glassware and jewelry, all executed using 18th-century methods. The artisans are not simply reenacting life two hundred years ago, they are actual craftsman producing quality work that you can purchase.
Monday, October 26, 2009
Sunday Afternoon
I often find myself drawn to the shop on quiet Sunday afternoons. I feel the need to build something or make progress on the latest project, but oftentimes I end up cleaning or rearranging things instead. I rather enjoy making my workspace more efficient. It makes the real work happen quicker and easier.
This summer I added a couple tools to my kit. I don't collect woodworking tools, although I've felt the lure on many occasions. I just don't see the point in having tools I don't use. Subsequently, I often hesitate to buy new tools, convincing myself that if I didn't need it until now, why should I ever need it? Once I convince myself to make the purchase, if I don't use the tool, I'll get rid of it. I've haven't had to do that much, so my system must work okay. It also forces me to get as much as possible out of the tools I do have. Consequently, I've developed ways of accomplishing some tasks that would likely be easier or faster with the "perfect" tool.
The new tools however have begun to pile up, since my previous tool rack was created to store a relatively fixed number of tools.
The top picture shows my shelf and tool wall just after the previous renovation. See how neat the plane shelf was? That didn't last long.
My plane shelf has been doing double duty as general storage after picking up some Glen-Drake chisel hammers and some new old stock rulers, among other things. I like to keep my plane shelf for planes only. They are my favorite tools, and I like them to have plenty of elbow room.
Here's the detritus that is fouling my plane shelf. What a mess. I don't own a ton of planes. Just a few in fact. I know woodworkers who own dozens of planes, in all varieties and brands. I own maybe a dozen total, and no repeats. Again, I'm not a collector.
In the interest of getting organized I decided to make a new tool rack to get some of these tools off the shelf.
I always like the slot idea for storing tools. It's quick to make, simple, and versatile.
I have in the shop at the moment the latest tool from Brese Plane. It's a stainless steel panel-size plane with a 2 -1/4" iron bedded at 50 degrees. This is a unique plane. It's not stuffed with wood, unlike Brese's typical fare. But it has all the mass and solid feel of a traditional infill plane, with the ergonomics of the more common man's Bedrock-style plane. This is the first project I've had the chance to use this plane on, and so far I like it very much. I like to be able to pinch the toe with my left hand when planing edges. I also like this size of plane for small projects like this. The heft of the plane (just under 8 pounds), combined with the longer sole (it's about the size of a 5 1/2 bench plane) means I can clean up my power planer and jointer surfaces without having to switch from a longer jointer plane to a smoothing plane. Yes, I have to take a couple more strokes since I have the plane set for a fine cut (finer than I have my jointer set), but then I'm done. To read more about this plane, see my friend Al Navas' blog.
I also picked up a few files and rasps this summer from Slav Jelisejevich, famous file monger. Thanks to a couple Benchcrafted Mag-Bloks, I have all my files and rasps effectively stored and displayed for quick access. They are top center right under the big wood jointer. I also moved my carving tools (also stored on Mag-Bloks) up to make room for more frequently used tools.
I also added a couple 12" Mag-Bloks to face of the new tool rack for holding miscellaneous smaller tools. A quick slotted board, fastened vertically and kerfed on the bandsaw holds my most frequently used rulers. Some mini Shaker pegs get my Glen-Drake Tite Hammers off the shelf.
I'm not sure where the next improvement will lead. My tool wall is between two windows and is already pushing its limits. Hopefully my tool kit will expand very slowly.
Sunday, April 12, 2009
Making Rope From Wood--Carving Rope Columns by Hand

I hate turning.
Bowls, spindles, boxes, pens, definitely not pens, doesn't matter. I just never had the desire to turn for interest or fun. And I still am not crazy about it. I've watched videos of Richard Raffan make it look easy. I've spent hours trying to work a skew chisel with skill only to have it catch on the last cut. Nevertheless, I have to do it for certain projects.
Recently I got a commission for a piece of carved furniture that included some carved rope twist columns in basswood. Here's a quick step-by-step on how I do it. Nothing revolutionary here. I had the camera in the shop and thought I'd snap a few shots.

These half columns start out as split turnings. Before gluing the two halves together I lay a single layer of newspaper in the joint. This is an well-known technique and it works great. The center points need to be dead on center and each half must be precisely dimensioned for the finished columns to match. Here I've turned down the major diameters so I can bandsaw a curve in the capital and still have a flat reference surface for cutting on the bandsaw.


I cut the curve into all four sides.

Then I remount the column in the lathe.

Roughing out the shaft of the column.

The shaft completed.

The base of the capital is transitioned into the bead at the top of the shaft.

Here I'm getting ready to turn the large bead at the base of the shaft. I hate this part, since it's really easy to catch the corner of the square base, especially in this basswood.


The shaft and beads complete after a little sanding.

To lay out the spiral I begin by drawing a grid on the shaft. The less squares, the wider the bines (these are the individual "ropes") will be. I shoot for a chunky bine at about 45 degree pitch that will catch the light nicely.

To draw the spiral lines I use some cardstock or other heavy paper and connect the corners of the squares.

The spiral layout line.

I begin carving the bines with a 90 degree V-tool, about 12mm wide. I don't go too deep, because on one side of the bine I'm cutting with the grain, the other side is against the grain. I don't want to tear out the grain to extent that I can't get below it later.

Here I've done almost all the bine valleys. Notice that I terminate the valley in a nice point short of the beads.

If I didn't carve deep enough the first time around, I'll make another pass and deepen the valley slightly.

I switch to a #3 sweep fishtail gouge (again, about 12mm) and knock the top corners from the bines, making them as round as possible with the carving tool. Since I'm now only working one side of each bine (with the grain) I can only do half the bines before switching to the other side of the lathe and doing the opposite half with the grain. It's easier to carve clockwise spirals than counterclockwise for me since I'm right handed.

This is what the spirals look like after the #3 gouge work.

Next I take some 120 grit paper on a convex sanding block and refine the bines.

I've sanded about half of them.

After sanding all the bines to shape, I go back with 180 and 220 (this goes quickly) to further smooth the carving.

To give some crisp definition to each bine I go back with a 60 degree V tool and make a light pass in each valley.

Once the carving is complete, I split the turning. I drive a chisel right into the end grain of the glue joint.

Once it starts to give way, I'm careful so I don't crack the narrow section below the bead.

Pop!

Works like a charm.


It's fun to see 3 columns multiply into 6!

Here's a pic after carving the capitals.
And here's a couple pics of the finished piece.

Subscribe to:
Posts (Atom)