Sunday, February 28, 2010

A collaborative effort--Shaker Bench


Last year I got a call from Ron Brese of Brese Plane. He wanted to discuss a new bench for his woodworking shop, and incorporate Benchcrafted vises into it. Over the past few months Ron designed his new Shaker-style bench and built the red painted cabinet base pictured above. At Ron's generous invitation, I went down to Thomaston, GA for the last phase of construction; building the top and installing the vises.


After almost a week of long nights, Ron and I got the bench about 90% finished. As I mentioned in an earlier post a couple weeks ago, watching Ron at work was a real pleasure. It's not often you get to see an accomplished tool maker use his own tools to construct a piece of furniture.

Christopher Schwarz says in his excellent book Workbenches... that the Shaker bench has an "indescribable appeal". The legacy of the Shaker craftsmen seem to be expressed in this bench design more than any other bench style. Continental benches (trestle base, overhanging top) are too ubiquitous to carry such an aura. English benches are rather plain and never gained the widespread popularity of the Continental style. How many modern-day bench makers offer an English-style bench? Maybe it's because so few Shaker benches still exist, or ever existed (due to the short span of that community) that this feeling has developed. Perhaps its also that Shaker benches are maybe the only truly American style bench.

In The Workbench Book (Taunton) author Scott Landis writes about the distinctive feature of the massive Shaker bench at Hancock Village:

"The order and cleanliness provided by the enclosed base cabinet had many practical dividends for the workbench. The problems of racking and sliding, which are inherent in an open-frame base, are automatically resolved by the rigidity of the casework and the sheer weight of its structure. Loaded with tools, as it presumably was, the cabinet anchored the whole bench to the floor and to move it would have taken a small army."


The cabinet on Ron's bench is as rigid as any Roubo base I've seen, including the several I've built.

Ron comments:

"My former bench included an enclosed case for the base and this works well in my limited space. For me this is sort of the ultimate version of that style bench. Seeing the famous workbench that resides at the Hancock Shaker Village in person verified to me that this was the bench that I wanted to build. The advantage to this style construction is that it really simplifies the build of the top and I like the look of the top made of 3 wider boards as compared to a lamination of several 8/4 thicknesses. Having a stout cabinet to support the 2" thick top really makes this possible. Besides the wonderful work holding capability of this bench I visually enjoy the contrast of the red base to the natural color of the maple top. I was quite lucky in that the maple that I purchased for this project possessed a nice honey to medium brown color. This bench is the first thing I see when I walk in my shop everyday, standing at the ready to assist me with my work."


A recent J-style smoothing plane perched on top of Ron's new bench.

There are some aspects to the Shaker bench that prevent options for every workholding situation. The most significant is the ability to use holdfasts in the top, since the cabinet below would interfere with the shaft. There are ways around this. See the Lee Valley Hold Down with short shaft. Ron's top overhangs the base by several inches all around, and provides ample clamping opportunities. Ease of construction is also a plus of this bench design. The top is 2" throughout, with a front section at 4-1/4" containing the dog holes and vises. The cabinet base, with its several solid, vertical dividers provides lots of support for the top. The back of cabinet is finished with lapped solid pine boards.


An interesting note about Ron's Glide Leg Vise. He opted to install the roller brackets on the inside of the cabinet's end, making the vise hardware completely invisible from the outside. A handy access panel at the end of the base cabinet allows ready access to the guts of the vise. Ron reports his innovative arrangement works as smooth as silk.

I'll never give up my Roubo, but as a second bench I am seriously considering building a Brese-Shaker style bench. I enjoy the open base of my Roubo for storing bench appliances, but the cabinet base of Ron's bench offers oodles of storage, and that's something that any shop can use more of. Plus, I'll readily admit it (I take pride in being a practical woodworker, perhaps falsely so), who would not be inspired by having a bench like Ron's greet you whenever you head to the shop.

Ron and I shot some video during the build. This is an HD video. To get the full experience, click on the "full screen" icon in the bottom right, then make sure "HD ON" is selected (bottom right) once the window fills the screen.


Brese Plane Shaker-Style Bench Video, Part One


Brese Plane Shaker-Style Bench Video, Part Two

Tuesday, January 12, 2010

Traditional Woodowork in the Balkans


In Northern Greece there is a large peninsula that has served as the home to spiritual aspirants for over a millennium. Life on Mt. Athos (named for the peak at the eastern end of the peninsula) has remained largely unchanged since its founding in the 10th century. Greek Orthodox monks live a life of prayer and fasting, and when not engaged in prayer or worship, occupy themselves with everything from incense-making and sewing, to carving and turning wood. These items are sold in order to buy the necessities of life that can't be produced by the monks themselves. Since many of us woodworkers tend to spend large amounts of time in solitude in our shops, I'm reminded of the disciplined life of these monks whenever I'm alone in the shop. Their accomplishments go largely unnoticed though (and rightly so), as their works are left unsigned and thus anonymous. When works are signed, they are prefaced with the phrase "by the hand of..." thus showing that the work is accomplished by the grace of God, through the hand of the worker.

The following video which shows one such shop on Athos. Much like many of the pre-electric European and American shops, this is one is powered by a water wheel and leather belting. Later in the video we see a monk who specialized in miniature carving. Some of these ornate crosses take years to finish. We also see a human-powered olive oil mill.


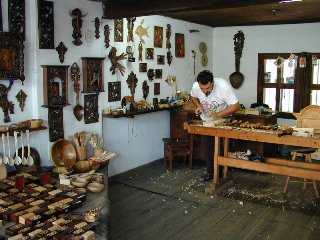
Although not a monastic setting, the ethnographic museum "Etar" in Gabrovo, Bulgaria shares some similarities with the small shops of Athos. I visited this working museum in 2000. It's much like Colonial Williamsburg. The entire village runs off water power, harnessing that resource to drive lathes, mills and various other machines, as well as provide places for washing clothes. The shops along the main street of the village offer everything from carved spoons and boxes to fine metalware, glassware and jewelry, all executed using 18th-century methods. The artisans are not simply reenacting life two hundred years ago, they are actual craftsman producing quality work that you can purchase.


Wednesday, December 9, 2009

Brese Panel, Bench discoveries


I've been building a trio of small Shaker end tables with my niece and nephew over the past few months. Sadly, they don't have an industrial arts or woodworking program at their school, so I though it would be a good idea to give them some shop time and get their feet wet in some old-school woodworking, the kind that I was exposed to growing up. It's hard to compete with Call of Duty and Ipods, but I think these sessions will plant a seed and hopefully blossom at a later time when the lures of youth start to fade. During the past couple sessions (I'm building a table too to walk them through the process) I've found myself reaching for a plane that I've been babysitting since early October.


Ron Brese's latest creation is a stainless steel panel-size plane with an atypical infill. It doesn't really have an infill at all. I first saw this type of arrangement while browsing through some old plane patents, and later when I read an article about the Sindelar Tool Museum which featured joined-body planes with lever-caps and separate totes and knobs. Ron's plane echoes the classic lines of the old Norris planes, with its sidewall profile and traditional lever cap. The panel plane always interested me, mostly because I didn't know what it was used for. Is it a smoother? a Jack? Well, it's basically telling me what it is in using it the past couple months. I'm finding myself using it to remove jointer and planer marks on smaller workpieces where I can flatten and smooth without changing tools. I just take a couple more strokes (my shavings are about 2 thou).


The ergonomics of the tool are great. I think the sidewalls are a tad too high (this is a prototype after all), but Ron's tote's always fit my hand perfectly. I also greatly prefer the front knob to a the square bun arrangement typical of infills. There's one feature I discovered right away that I really like. See the curve in the top of the steel frog where it transitions from the inside of the side wall to the side of the tote?


This area is perfectly for my index finger. It's almost like the plane was made for my hand. I feel like I'm in total control when I place my finger here. It's great. More info later as I continue to have fun with my "loaner".


Last month I took a Sunday afternoon and made a bench dog for every hole in the top. Why didn't I do this before? I don't have to search for a single dog anymore, plus something very nice happened. New workholding opportunities are presenting themselves. I was planing some narrow boards using Chris Schwarz's leg-vise planing stop (I love using this accessory) and I needed some lateral support. Bingo, pop up two dogs and I have restricted movement in two planes almost instantly. Love it! I can even reposition the stop so the first dog lands right at the beginning of the board, preventing any kick-out at the beginning of the stroke. Here's where I could see a real advantage to having a row of dog holes a bit farther back from the front edge for working wider boards. That's a trade-off though too. No bench is ever perfect.


Monday, November 16, 2009

Roubo Bench Mystery


I was looking at some hi-res scans of L'Art du menuisier and found an interesting element just below the top to the right of the left leg. I've never noticed this before, and am curious as to its function. If anyone has any idea what this thing is, please comment below.


Follow up: I found another instance of this object hanging on the left wall with other layout tools and gauges. This one clearly has a round hole in it and is hanging on a nail on the wall. I'm wondering now if it might be a pattern. See the item to the right, it looks like pattern for an ogee shape. This wouldn't be a layout tool, since its shape and size specific. Hmmm...

Tuesday, November 3, 2009

This Blog Is Daed


Daed Toolworks Smoothing Plane

A couple of years ago I became interested in infill planes. I've been interested in hand planes for many years, but I'd always written off infill planes as exotic, too expensive, and generally out of reach. It wasn't until I laid my hands a small smoothing plane made by Wayne Anderson (someone was kind enough to bring one to a Lie-Nielsen event for me to try out) that I realized what I had been missing all those years. Don't get me wrong. I still think infill planes are exotic, expensive (relatively speaking), but not so out of reach after all. Shortly after I tried the Anderson plane I was approached by Ron Brese who offered me an infill kit to build at a significant discount, if I agreed to complete the kit in a certain time frame and give him feedback about my experience. The result was incredible, and that particular plane is one of my favorites today. So once the infill seed was firmly planted, I began to research these tools and familiarize myself with their characteristics.

About this same time I started corresponding with Raney Nelson. I first met Raney at Woodworking in America in Berea Kentucky, but Raney and I had shared numerous emails before that event. We both share a great interest in doing fine woodworking, and in particular, handplanes. Raney answered a bunch of questions about planes in general, and opened my eyes to the workings of Japanese hand planes, which I had previously known little about. Raney sent me one of his own Japanese planes (that he built) and I tried my hand at pulling a plane instead of pushing it. I got some shavings from that plane that still amaze me. It's a stretch to even call them shavings, since they resembled spider webs more than wood. And the surface it left was simply phenomenal. Now I understand why so much Japanese furniture is left unfinished. I still prefer the western style planes, but I credit Raney with introducing me to the world of the Kanna.

So when Raney pulled out some of his hand-made infill planes at Woodworking in America last fall, I was quite excited to see his work. So much so that I asked Raney to build a special plane for doing some of the geometric inlay work that I incorporate into ouds. It's a very small miter plane meant to be used with small shooting boards. The plane is steel and ebony and in its diminutive size (just about 5" long) does its job well.


I've always been fascinated by how traditional infill planes are made. Lucky for me, Raney has decided to start a blog about the process. Someday I'm hoping to to tackle a traditional dovetailed-side infill plane. In the meantime I'll be watching the Daedworks Blog for inspiration.

Sunday, November 1, 2009

Peg Fitting Tutorial


I posted this video and instructions to Mike's Oud Forums a few years ago. I've gotten lots of emails lately on how to fit pegs, so here's the text and video from that post. I also added the video link to the list of videos at the right side of the blog. I've since refined my technique a bit from this process, but this will get you there just the same.

Step 1: Score the peg shaft.

In order to have a clean line when shaping the peg it's a good idea to slightly score the peg shaft right under the bead where it meets the shaft.

Step 2: Shape the peg shaft.

This is a Herdim peg shaper. They cost about $100, but it's a great tool and well worth the money if you're ever going to refit at least one set of pegs. I find it easier to clamp the peg head in a vise and turn the shaper instead of turning the peg, it also yields a smoother cut, in my experience. This particular shaper has 4 sizes, all very slighly different. I usually use one of the middle two. I've found that a larger peg shaft turns smoother, but a smaller peg shaft provides easier tuning since it has to be turned more to raise or lower the pitch. To set the taper of the blade on the shaper, put the reamer in the tapered hole (smooth side up) and slide the shaper's blade over to the smooth reamer shaft and tighten it down. Now the shaper cuts the exact same taper as the reamer. Remove the reamer by turning it counter-clockwise so the cutting edges aren't damaged. Slow down and be very careful when approaching the beads, it's easy to cut them off! Aim for a consistent pressure while rotating the shaper. The blades are very sharp and cut very smoothly. Let the tool do the work

Step 3: Ream the hole.

--Note-- If your peg box holes are too large, you'll need to ream the holes and plug them (glue them in) with special tapered plugs, or make your own with dowel rod and the shaper. If the old pegs are decent wood, you can even glue these in, just make sure they fit well. Then drill new holes and proceed.

Start reaming the hole and check the fit often so you don't ream too much. Take your time-don't force the reamer-clean the shavings from the grooves regularly, it will work better. You can also check the diameter of the large end of the peg and find the same spot on the reamer and mark it so you don't over ream.

Step 4: Check the fit and ream more if necesary.

Step 5: Burnish to check fit.

When you get to the spot you like (since the pegbox is usually tapered, the pegs toward the tip will need to go further in so all the pegs protrude from the pegbox the same amount--for a nice look) spin the peg a few times to burnish the contact area. Also feel if the peg has the same amount of resistance for the entire revolution. If it gets easy then stiff, easy then stiff, the peg is not round or the hole is not round. (If you shaped and reamed well, this won't happen). Inspect the shaft. If there are two equally shiny bands that go completely around the shaft your peg is fit. If not, you need to maybe readjust your shaper blade's taper.

Step 6: Add a little peg compound.

Rub a little peg compound (you can get this at any violin or music shop) on the shiny bands and test the fit again. This well tell you to a greater degree the accuracy of the job.

Step 7: Chek the fit some more.

You can see that the shiny bands are more pronouced and go completely around the shaft. This is what you are looking for.

Step 8: Polish the peg

I sand the peg shaft a little with 600 grit (this fine grit won't change it's shape, unless you go hog wild and spend the whole afternoon on it!) and apply a little paste wax and buff it so the shaft has a nice look to it. Not like raw wood.

Step 9: Apply beeswax

At this point the peg fits so well that it might grip too much and when turned you can hear it squeak as it turns in minute "grippy jerks". This is no good for fine tuning. We need to apply some type of lubricant for smooth turning, but not some thing that will cause slippage. Nature's perfect solution: beeswax. Put a little 100% beeswax (get from a honey producer or from a craft store, or a 100% beeswax candle--it has to be 100% beeswax, no paraffin) on the shiny bands and work it in with your finger a little. Put the peg back. Smooth, firm turning with no chatter or slippage.

Monday, October 26, 2009

Sunday Afternoon


I often find myself drawn to the shop on quiet Sunday afternoons. I feel the need to build something or make progress on the latest project, but oftentimes I end up cleaning or rearranging things instead. I rather enjoy making my workspace more efficient. It makes the real work happen quicker and easier.

This summer I added a couple tools to my kit. I don't collect woodworking tools, although I've felt the lure on many occasions. I just don't see the point in having tools I don't use. Subsequently, I often hesitate to buy new tools, convincing myself that if I didn't need it until now, why should I ever need it? Once I convince myself to make the purchase, if I don't use the tool, I'll get rid of it. I've haven't had to do that much, so my system must work okay. It also forces me to get as much as possible out of the tools I do have. Consequently, I've developed ways of accomplishing some tasks that would likely be easier or faster with the "perfect" tool.

The new tools however have begun to pile up, since my previous tool rack was created to store a relatively fixed number of tools.

The top picture shows my shelf and tool wall just after the previous renovation. See how neat the plane shelf was? That didn't last long.

My plane shelf has been doing double duty as general storage after picking up some Glen-Drake chisel hammers and some new old stock rulers, among other things. I like to keep my plane shelf for planes only. They are my favorite tools, and I like them to have plenty of elbow room.


Here's the detritus that is fouling my plane shelf. What a mess. I don't own a ton of planes. Just a few in fact. I know woodworkers who own dozens of planes, in all varieties and brands. I own maybe a dozen total, and no repeats. Again, I'm not a collector.


In the interest of getting organized I decided to make a new tool rack to get some of these tools off the shelf.


I always like the slot idea for storing tools. It's quick to make, simple, and versatile.


I have in the shop at the moment the latest tool from Brese Plane. It's a stainless steel panel-size plane with a 2 -1/4" iron bedded at 50 degrees. This is a unique plane. It's not stuffed with wood, unlike Brese's typical fare. But it has all the mass and solid feel of a traditional infill plane, with the ergonomics of the more common man's Bedrock-style plane. This is the first project I've had the chance to use this plane on, and so far I like it very much. I like to be able to pinch the toe with my left hand when planing edges. I also like this size of plane for small projects like this. The heft of the plane (just under 8 pounds), combined with the longer sole (it's about the size of a 5 1/2 bench plane) means I can clean up my power planer and jointer surfaces without having to switch from a longer jointer plane to a smoothing plane. Yes, I have to take a couple more strokes since I have the plane set for a fine cut (finer than I have my jointer set), but then I'm done. To read more about this plane, see my friend Al Navas' blog.


I also picked up a few files and rasps this summer from Slav Jelisejevich, famous file monger. Thanks to a couple Benchcrafted Mag-Bloks, I have all my files and rasps effectively stored and displayed for quick access. They are top center right under the big wood jointer. I also moved my carving tools (also stored on Mag-Bloks) up to make room for more frequently used tools.


I also added a couple 12" Mag-Bloks to face of the new tool rack for holding miscellaneous smaller tools. A quick slotted board, fastened vertically and kerfed on the bandsaw holds my most frequently used rulers. Some mini Shaker pegs get my Glen-Drake Tite Hammers off the shelf.


I'm not sure where the next improvement will lead. My tool wall is between two windows and is already pushing its limits. Hopefully my tool kit will expand very slowly.